

My Skin Care Routine {The Oil Cleansing Method}

This post may contain affiliate links, which means I make a small commission at no extra cost to you.
See my full disclosure here.
After several years of experimentation, I’ve finally landed on a great skin care routine. Today I’ll show you what I use–it’s pretty simple, fairly economical and I’m really happy with the results.
The Oil Cleansing Method
Have you heard of it? Believe it or not, the Oil Cleansing Method actually has nothing to do with essential oils. It’s recommended for all skin types, and can work quite well for oily, acne prone skin (like mine).
Here’s the nutshell version: instead of stripping your face with a harsh or synthetic product, you actually massage oil into your face. Next, you’ll steam your face with a hot, wet washcloth. Then use the wash cloth to wipe away the oil, makeup, dirt, etc. Rinse and repeat.
You can read more of the nitty gritty details here: The Oil Cleansing Method: Your guide to soothing facial massage for clear, soft, glowing skin.
The method itself is very simple and easy to do.
One of the tricky parts is identifying the best combination of oils for your particular skin. The article linked above gives recommendations for where to start according to your skin type, but my experience included several steps of experimentation.
 The Evolution of My Oil Cleansing Method
I should point out that these are the general formulas I used, as best as I recall. This process stretched across several years and I’m probably forgetting a few details, but these are the main oils I have used and steps I have followed.
1. Jojoba Oil
This didn’t work at all for me! I’d heard and read that some folks use straight jojoba oil for makeup removal and cleansing, but my skin definitely did not like this option. I noticed more breakouts. But much later, I also changed the method a bit (keep reading) and wondered if this would have made a difference with the jojoba oil.
2. Coconut Oil
I actually can’t remember which came first–Coconut or Jojoba–but this didn’t work for me, either. I really wanted it to, because how easy would that be? Lots of folks love coconut oil for facial purposes, but I’ve found that I can’t use it even as a moisturizer. It tends to block my pores.
3. Castor Oil + Sunflower Oil
This combination was recommended in the aforementioned Oil Cleansing Method Guide.
Since my skin is oily, I started with a formula of 30% Castor Oil and 70% Sunflower Oil. It actually turned out to be too drying for my skin, so I reduced the amount of Castor Oil.
 4. Tamanu Oil
At some point, I read this helpful post by Crunchy Betty and started adding Tamanu Oil to my concoction. I add just a few squirts to each batch of facial oil.
According to Mountain Rose Herbs, “Tamanu oil is a remarkable topical healing agent with skin healing, antineuralgic, anti-inflammatory, antimicrobial, antibiotic, and antioxidant properties. Its benefits are notable for scarring, stretch marks, minor cuts and abrasions, rashes, sores, and much more.”
5. Almond Oil, Olive Oil, and Jojoba Oil (again)
Somewhere along the way I read about the benefits of almond oil and decided to experiment with adding that to the mix, too. Almond Oil is great for all skin types and “is best known for its ability to soften, soothe, and re-condition the skin”, according to Mountain Rose Herbs.
And once, I ran out of Sunflower Oil and had only Jojoba Oil on hand, so I tried it again, this time with my Castor, Tamanu and Almond oils. It seemed fine, which was a relief.
I’ve also added Olive Oil to the mixture when I didn’t have Sunflower Oil on hand.
My Current Formula
What I’ve landed on for now is a loose adaptation of this formula:
- 1/4 part Castor Oil
- 3/4 parts Sunflower or Jojoba + Almond Oil
- A few squirts of Tamanu Oil
 How to Mix and Store Your Facial Oil
Truthfully, I don’t really measure any of my ingredients. I wash my face in the upstairs bathroom, and have no desire to mess with measuring devices up there. (I’d need a separate set, how would I keep them clean, blah blah blah.) So I just sort of eyeball the amounts, mixing up a new batch whenever my previous batch runs out.
Therefore, each batch of my facial oil is likely a bit different. I’d make a terrible subject for a clinical study! It’s ok. It works for me!
I’ve used a few containers to store my facial oil, but here’s my favorite: a recycled fractionated coconut oil bottle. It’s the best!
It’s dark, which protects the oils from light, but transparent enough that I can see how much oil is in the bottle. This is so helpful when mixing up a new batch! And it has a nifty spout and cap, which works perfectly for this method.
 Where to Find Good Oils
You’ve got many options, of course, but my favorite source is Mountain Rose Herbs. See their complete list of carrier oils here: Carrier & Vegetable Oils. I also love to use their beeswax and shea butter for making hard lotion, and I order their herbs in bulk.
The Procedure
1. Start with a dry face. I use the Oil Cleansing Method at bedtime, and only when wearing makeup. In the shower (with a makeup-free face) I wash my face with goat milk soap.
2. Have a clean, dark washcloth ready, as well as something for removing eye makeup. I use this reusable eye cleansing cloth.
3. Turn on the hot water in your sink.
4. Massage a tiny bit of facial oil into the eye area.
5. Wet the eye cloth and wipe off oil and eye makeup. Rinse and repeat until all eye makeup is removed. Pat dry with the clean washcloth.
6. Place a small puddle of facial oil in the palm of one hand.

8. When the water is very hot, saturate the washcloth, wring it out a bit and quickly lay it over the entire face. Allow it to steam the face for a minute or so, until it’s not very hot anymore.
9. Use the wet washcloth to wipe and remove oil, makeup, dirt, etc.
10. Re-saturate the washcloth with hot water and continue wiping and removing residue until your face feels clean.*
11. Pat dry, or rinse your face one final time with warm water and then pat dry.
*This is the step I didn’t understand for a long time. Then one time we stayed at a hotel and I used their white washcloths for my Oil Cleansing Method, and realized I’d been leaving lots of makeup on my face! With the white washcloth, I could tell when all the makeup was finally gone and my face was clean.

Will You Need to Moisturize?
From what I’ve read, it seems to vary.
This is the reason why, for so long, I wasn’t wiping and cleansing adequately. I thought I should still feel some softness (the oil) on my face when I was finished, in order to avoid needing a moisturizer.
Finally, I realized I needed to wipe and cleanse more thoroughly, even if that made it necessary to moisturize afterwards.
Now I almost always apply a tiny bit of my favorite unscented lotion (pictured above), very lightly, following the Oil Cleansing Method.
 And Then, Essential Oils
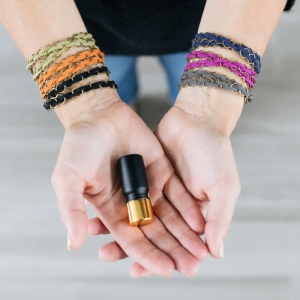
At the very end, I often apply a few essential oils such as…
- doTERRA’s Purify Cleansing Blend (Lemon, Lime, Pine and Tea Tree)
- Geranium
- Melaleuca (Tea Tree)
- Frankincense
Sometimes I use Immortelle (an amazing blend of Frankincense, Helichrysum, Lavender, Myrrh and Sandalwood) around my eyes.
Read more here: Essential Oils for Clear Skin.
The Bottom Line
Here’s the bottom line for those of you wanting to try the Oil Cleansing Method: Do a little reading on the topic, pick your oils, and just jump in.
The Oil Cleansing Method has worked really well for me, though it did require a bit of experimenting along the way. If you try it, let me know how it goes…happy oil cleansing!
")
Sign up NOW for my best tips delivered weekly to your inbox!
You’ll also get instant access to my library of free ebooks and resources.

I love OCM too! It really changed my skin. I thought I had extremely oily skin, like a total grease slick, but it turns out my skin was just overcompensating for all of the drying out I was doing with harsher and harsher cleansers! What a vicious cycle. Anyway, now I use this, and I love it. It’s organic and lovely smelling too. https://www.etsy.com/listing/226014971/organic-sensitive-skin-oil-cleanser-ocm?ref=shop_home_active_11
Love your sharing. I like it. I always use coconut oil and now and I know I can use many amazing oil together. Thanks
I really like your skincare routine. I can add some new steps in my skincare routine. Thanks and keep sharing.
Thank you for sharing, they all look great, try Neutriherbs skin oils, they are the best skin oils I have ever used, using natural ingredients and formulas, suitable for all skin types.