

Kitchen Island Re-do

This post may contain affiliate links, which means I make a small commission at no extra cost to you.
See my full disclosure here.
This project has been on our list for some time now, and I’m so thrilled it’s finally finished!
I’ve always loved this piece: it’s got a great story–plus a family connection–and it’s just the right size, shape and “look” to serve as our kitchen “island.”
[Warning: Many photos to follow…]


Here’s the story:
Back in Texas, a dear relative of Mr. Native Texan’s had rescued this beautiful dresser from a neighbor’s curbside trash. She had no use for it, but couldn’t bear to see it thrown away.
The bottom drawer was broken (see below) and missing its hardware. Other than that, the piece was structurally sound and we loved the chippy white paint.
We didn’t have a specific use for it either, but hauled it with us to our new state in hopes of finding a good spot for it in our new home.
When we bought our new home, the kitchen lacked an island. The previous owners had used a nifty cart on wheels that was just the right size for the space, but they were taking it with them.
We considered a number of options before realizing our broken, chippy white dresser was the perfect size and shape for that spot.
Hooray!

Mr. Native Texan glued the drawer back together–here it is, held together with clamps while the glue dried.
The only other problem was the bottom drawer’s missing hardware.
I had no clue how to find matching antique hardware, nor did we want to replace the hardware with something new and less interesting.
Plus, we really loved the chippy paint and didn’t want to repaint the piece. Removing the existing hardware would leave big brown circles of the original wood finish.
Hmmm….
Imagine our great delight to receive a small, wooden cabinet from my parents, who’d rescued it from a rental property and had no use for it. Guess what: it had two, round, antique drawer pulls that were an almost perfect match for our existing hardware!
We removed the hardware and sold the piece–sans hardware–on Craigslist.
If you look closely at the following photo, you’ll notice the pulls on the bottom drawer are a tiny bit smaller than the pulls on the top two drawers. The difference is barely noticeable, though–I use these drawers every day and often forget that the pulls don’t match.

Oh, and the back of the dresser
I almost forgot that the back of the dresser was unpainted.
We simply took a drawer to Home Depot and had them mix up some paint to match, and then Mr. Native Texan applied a few coats to the original back side of the dresser.
It looks great!

The next problem was that we never did anything to protect the top of the dresser.
We’d contemplated cutting butcher board to fit on top, or glass, or something more durable than chippy, painted wood–but never followed through on it. We decided just to use it the way it was, and cross that bridge later if necessary.
Eventually, the paint on top of the dresser began to peel away even more, especially near the front where we use it the most.
So one night not too long ago, while Mr. Native Texan was away on a business trip, I got this urge to peel off more of the paint with my finger nails. Before I knew it, this is what I’d done:

There was no turning back now, but I’d sort of lost my steam.

Lovely, isn’t it?
We actually lived with the island like this for weeks, as there was never a good time to remove it for refinishing. Plus, we had lots of gardening projects in the works, along with a busy calendar.
Well. Finally–with the boys away at “Mimi & Papa Camp”–we found a good time to remove all the drawers and haul the dresser out to the shop.
It really didn’t take that long to sand off the rest of the paint from the top of the dresser. Then, we just wiped it clean and applied three coats of clear polyurethane.
And when I say “we” I really mean “Mr. Native Texan.” 🙂 He did a great job, don’t you think?


I did contribute a bit of labor to this project: while Mr. Native Texan changed out the sandpaper on his hand sander, I put my fingernails to work again. These are the strips of paint I peeled off–with my bare hands! 🙂

Wiping it clean, post-sanding. (See? I also served as photographer. Mr. Native Texan loves to be photographed while working on projects.)

By the way, our E-cloths worked great for removing all the dust after sanding.

- Ready for polyurethane: we decided to leave it kind of streaky, instead of sanding it completely down to the bare wood. So some spots are bare wood, while others still retain a bit of the original finish.


I love it! Time will tell as to how well the finish holds up against water and other kitchen wetness, but I think any marks it incurs will serve only to add to its charm in an aged, well-loved sort of way.
Have you refinished any special pieces?
")
Sign up NOW for my best tips delivered weekly to your inbox!
You’ll also get instant access to my library of free ebooks and resources.
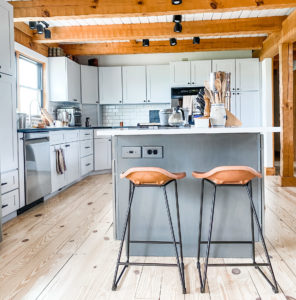


I would love to see how this piece fits into a kitchen. 🙂
Kathy–I’m actually a tiny bit insecure about the rest of the kitchen, which is why there’s no wide angle shot. 🙂 You may be happy to know I’m working on another project in the kitchen–when it’s finished, I promise to provide a better picture of the island’s surroundings.
Very nicely done. I love these kind of tutorials. Personally I would have varnished the whole cabinet though. I dont really like the rustic look.